Its time for the final 2 flowers! Here are the instructions for the Hydrangea and Geranium Flowers.
They are quite similar. If you would like a bit more variety, I am also giving you instructions for a Rose section.
Here are the downloadable instructions for all of these flowers. The geranium and hydrangea are together since they are nearly the same in stitches and shape.
Summer Garden Hydrangea and Geranium Instructions
Summer Garden Rose Instructions
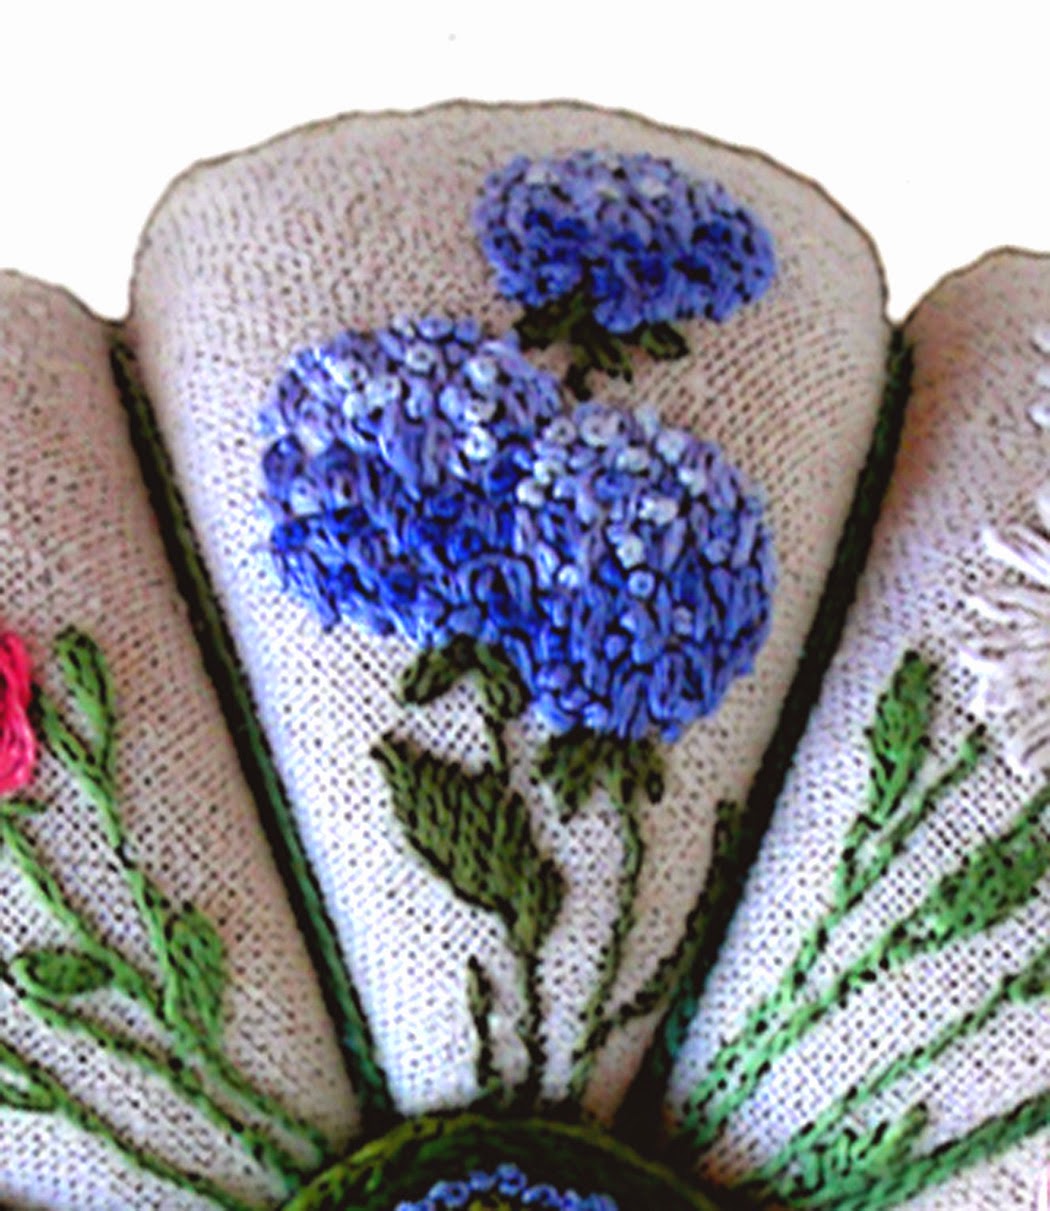
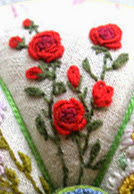
Here are a few images to show you how they look. I want you to notice that I did not stick to any specific colors or patterns for each example. I think variety is the spice of life! Go for it.
Hydrangea


 Geranium


 Roses
Roses


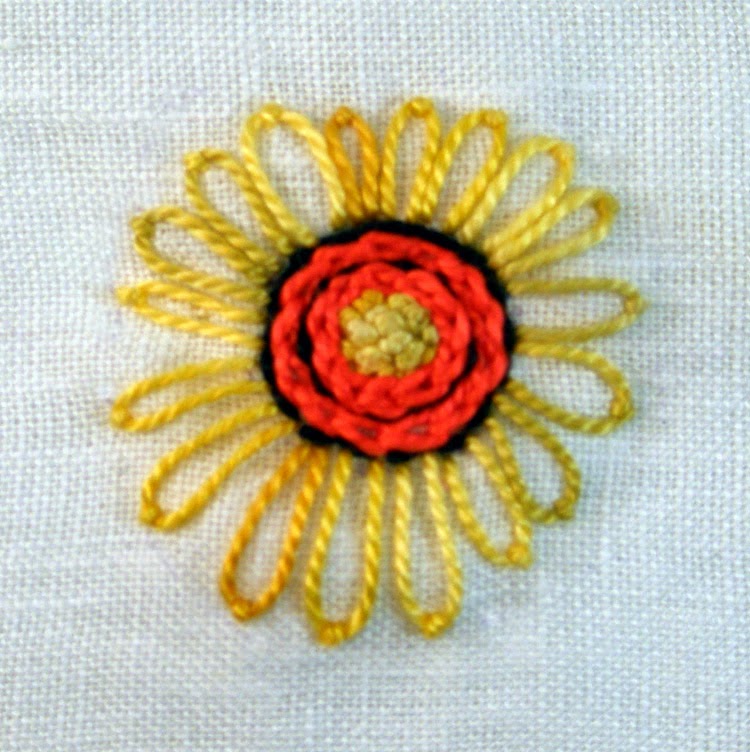
 Here are today's stitches.
I think you will see that you have used all of them so far in other flowers, so for the hydrangea and geranium you are ready to stitch!

The most common stitch to the hydrangea and geranium flowers are tiny
lazy daisy stitches.

You may choose to wrap your stem stitches for the hydrangea, since it is a woody stem in nature. Geraniums are a bit thinner. I kept the leaf pattern vague. I think you should decide how you would like to approach them. I like a simple fly stitch. For larger leaves, I may use a satin stitch and add a second color, one on each side of the leaf.

When you get to the Rose, you may need to learn a new stitch. The Bullion Stitch is so wonderful! I just love it. It has texture, it can be made as short or long as you like. It is really fun to do. Just think of it as an extra long french knot!
I do not have a tutorial up for this stitch on my blog. I am going to send you to see a wonderful and very expert stitching expert, Mary Corbet. She may be responsible for teaching thousands of people how to embroidery. Not only does she teach you how, she shows you in both a picture form and a video form! She also has created The Hand Embroidery Network. Its a wonderful place for stitchers to learn and share their work. She inspired and taught me much of what I know about embroidery. She speaks to both the beginner and the expert. She is so very talented and generous.
Every thing you wanted to learn about Embroidery, is here-
Needle N Thread.
Her Videos can also be viewed on U-Tube at her channel-
Needle N Thread
Her Stitch videos on her Web Site,
Needle N Thread are here.
Here is her
Bullion Stitch video tutorial.
Once you have your 6 sections of flowers embroidered, all you have to do it put it all together!
Tutorials for the final steps are on my blog.
First, you should
Block your Embroidery. This gets all the stitching nice relaxed. it will lay flatter and any imperfections will seem to disappear.
Find out how to
Block your Embroidery Here
Next, follow the
Classic Pincushion Tutorial to sew the top and bottom pieces together. Use linen for both. Use green or cream Perle Cotton, Size 5 to tie off each section.
I recommend that you use
Emery, but you don't have to. You can learn more about
Emery Here.
You can add a bit of lavender to the stuffing for a surprising aromatherapy session each time you use your pincushion.
Finally, create an
Embroidered Button. You will find that tutorial here. You can use a standard button if you like. I really think that the embroidered version is perfect for this project!
I hope you have enjoyed this tutorial. I have received so many wonderful comments along the way.
I am so sorry that I did not get all of the patterns up in time for you to give this pincushion for Christmas. I really tried.
Better late than never. Finish your pincushion and give it anyway! I have a feeling the recipient will not be too upset.
Thanks for all of your support and kindness. I love my blog because of you! I love to share my ideas and I am always thrilled to know that you are sharing your talents as well. I am trying to make time to visit your blogs. I have enjoyed getting to know you very much. It is such a joy to be a part of a creative family such as our own!
I'd like to post some of your pincushions. Please send me your images and a bit of info about yourself to my email address, jillverbick@gmail.com. I'd love to see how you are doing!
Happy Stitching!!!