Thursday, July 26, 2012

New Workshop on Stitched!


New on Stitched!
Alma Stoller, the queen of all things beautiful has a added a new workshop to the Stitched On-Line Workshops. Her workshop is called Soul Craft Art Quilt.


It looks like such a lovely project. If you don't know about Stitched, it is a on-line video workshop series available till Jan 2013. It features 22 workshops by some very amazing fiber artists. The cost of all 22 workshops is only $40. You have unlimited access to each workshop until January. I've watched nearly all of them and they are so well done and easy to follow. I've added some great new techniques to my sewing repertoire.
Click Here to see more and to learn about the artists.

Here are a few more projects from the series...
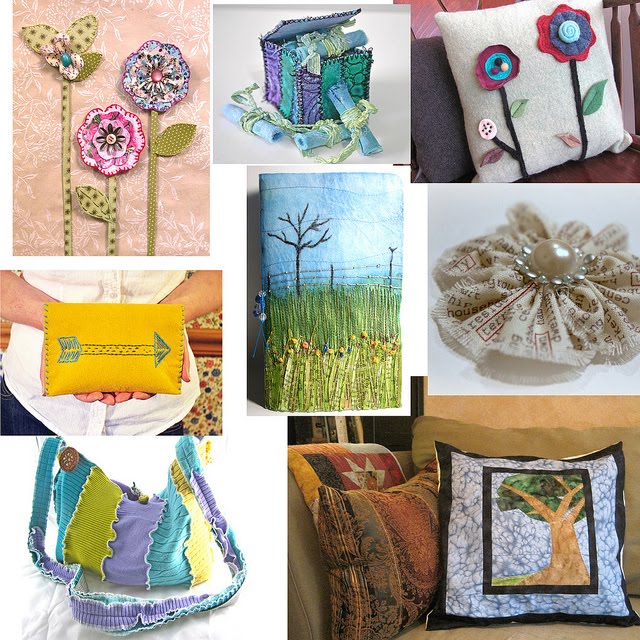


and more....


My project is a tiara called the Queen of Creativity.


I had a lot of fun creating the tiara. I teach 6 different embellishment techniques including needle felting, embroidery, how to draft a pattern, a way to create a flower embellishment using fibers and water soluble stabilizer and much more. I hope you enjoy the workshop and make a tiara or one of the other 21 amazing sewing projects featured on Stitched.

Here are a few more projects you might like to learn.

Funky Puffs by Karen Ruane-


Kelli Perkins Rolling Pin Samplers-


Tammy Gilley Heartstrings-


And one of my very favorites, Dale Anne Potter, Journal your Landscape


So click here to find out more about Stitched.
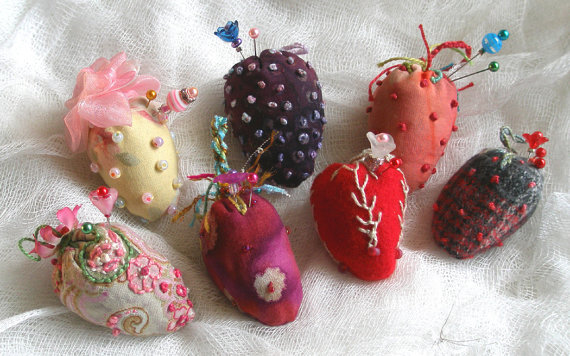
If you register for my tiara workshop when you first sign up, I'll send you a Strawberry Emery Pincushion from my Etsy Shop.


Saturday, July 7, 2012

Color and Design

Choosing colors for any project, be it an embroidered pincushion or a patchwork quilt is always a challenge. While design is essential, the colors your choose can make or break a project.

Color pushes one object closer (using warm or bold colors) while allowing others to drift to the background, (cool or muted colors). Mix them up and its like playing "Where's Waldo" with your focal point. Get it right, and the one thing you want to highlight, is front and center, even if it is not front and center.


When you forget or ignore the color rules, nothing takes front and center. Which is not always a bad thing... sometimes it's fun to create a color jumble.


While color is important, you should also consider, contrast,(light and dark) and value, (how light or dark a color is compared to similar colors around it).

Contrast- Using dark and light red prints can create areas of interest and allow design elements to shine.


Value- If the colors are all light, or all dark, the values are similar. While the design may create a focal point, it doesn't scream, "look at me!!!".
Tweet the values a bit and things will softly whisper, "I'm here.", but in a soft, kind of shy way.


I'm a person who loves to use color. I want to be knee deep in rich, saturated felted wools, and piles fun, colorful prints. Playing with these extremes requires a bit of restraint, or at least some understanding of how to tame these lovely beasts.
These amazing woven wools are hand painted by Pat at Misty Pond Primatives on Etsy.
The hand painted wool roving is from Woolie Bullie. Please visit there shops. You'll find it hard to pick just one color.


This post was totally inspired by a very talented blogger, fiber artist and quilter extradinaire. Her name is Jeni, she's lives in Madison, (go Wisconsin!) and her website and Etsy shop are called, In Color Order.

She has a number of lessons on color theory and quilting, how to choose, "The Art of Choosing", where you can learn about different types of fabric, building and organizing a great stash, and lots of info on color theory and color wheels.
Here are a few images from her blog...
Triangular Pincushion Tutorial;

Warm and Cool Colors


Vintage Sheets, Sparkling Cider Quilt


Visit her shop and take a look at Vintage Sheet Fabric Selections. I'm can't wait to get my Stash of Vintage Sheet Fat Quarters
or a Scrap Sheet Skinny Hem Grab Bag


Well I hope you dive into color. Its such a lovely lesson. Color is absolutely about the journey. The destination is everywhere!


Wool Leaf Pincushion


Friday, July 6, 2012

Complete Pincushion Kits now Available

The Sunflower Pincushion Kit

Every time I look at something created from fabric my second thought, (right after, "oooh, ahhh"), is "I bet I could make that.".

Then I don't.

The fact of the matter is, creating something is not easy. You need materials, equipment and time. Then of course, planning and executing the pattern is one of the most challenging parts of the process.

One of my wonderful Etsy clients asked me to create a kit for one of my most popular pincushions. At first I was a bit wary. Gosh, kits take a lot of time to put together. However, since I'm a "I bet I can make that" kind of person, I just had to give it a go. So I put together a few kits, complete with the pattern, fabric, floss, threads and instructions. Everything you need is there.

Do I feel bad about losing my "original" idea? Heck no. They say flattery is the best compliment. More than that, I am certain her pincushion will look like mine, but it will become hers in the end.


Even if we use the same colors on the same linen, I know her's will have her unique style. The stitches will be bigger or smaller, tighter or looser. The pattern will change according to her comfort level or her willingness to stray from the actual embroidery pattern. She hopefully will add a few bits from her floss stash and make some new marks. Maybe she will add more leaves, make longer petals or even change the pattern completely. You see, our hands, following the directions of our minds will always win over conformity. I love that about handwork.

....

Look for these kits which are already in my shop, or coming soon...
The Big Strawberry Pincushion Kit.

The Coneflower Pincushion Kit


Coming soon- the Lavender Pincushion Kit, complete.

I can also send the pattern and instructions only for these kits upon request. They will be available in my Etsy Shop, Fiberluscious for $8.00 each by the end of July.


Saturday, June 30, 2012

Take A Stitch Tuesday


I keep seeing TAST, (Take A Stitch Tuesday) entries all over the place. I see them on other blogs, on Pinterest, on Flickr, everywhere! Since my love affair with embroidery began, I have wanted to join in on the fun. This week, I did just that. I'll add it to her site, PinTangle.

This week's challenge is the Palestrina stitch. I've never done it before. In fact, I don't think I've ever heard of it. Luckily, it was in my book and of course on my two favorite stitch tutorial blogs, Mary Corbett's Needle 'N Thread and Sarah Whittle's blog, Contemporary Embroidery. Actually, Sharon B, the author of Pintangle and her blog, In a Minute Ago, has an extensive Stitch Dictionary. It's a wealth of information on each stitch, variations and beautiful examples. With all that inspiration, I had not one excuse not to learn something beautiful.

So I watched a few videos, something I highly recommend when learning a new stitch and I gave it a try. I first did a few dry runs on a hoop. I rarely use a hoop, but I could not see doing this one without the fabric being held taught. Like any stitch, it takes some getting used to. I find that repeating a stitch until I can do it without referencing the instructions is necessary. Once you find a rhythm, it starts to take on a life of it's own.

My creative process is really simple but it works for me. Once I do something new and feel comfortable with it, I stop working. I put down my needle and floss and walk away from any visual cues. I grab a pencil and something to draw on, usually my sketchbook. I usually sit outside on my balcony. I like to be surrounded my flowers and away from the TV or computer. I close my eyes and picture the stitch. I think of it's shape. I think of how it sits on the fabric. Is it a linear stitch? Does it fill a space? Would it be a good outline stitch or does it remind me of something?

The Palestrina Stitch is basically a line with knots on it. The knots make turning corners a snap. It can be worked in a very straight line. It can be thin or it can have long extensions at each knot. It can be worked side by side to fill in an area. It offers great texture when it is a solid piece. By itself, it feels like bones, or barbed wire, or even like the stem of the plant.

Here is an image from In A Minute Ago on the Palestrina Stitch...


Here is how beautiful it looks in a project. This image is also from Sharon's blog.


I came up with Christmas tree lights. Here is a detail shot of how the Palestrina Stitch makes a perfect wire. All you need to add is the bulb and of course those little cartoon slash marks to show that they are glowing. I also beaded the Palestrina Stitch and used it plain on the tablecloth.


I used a few other stitches in this little scene. I outlined each section with running stitches. I used the back stitch on the table cloth and the chair. Chain Stitches are used on the poles. I added lazy daisy stitches on the tablecloth and to create little fire flies, (lighting bugs). French knots are used as stars, as decorations on the little cake and on the chair. Just a few star stitches add a little magic in the sky. I worked on recycled wool and scraps of cotton.

My sample may not be polished but it was fun and I learned something new. Isn't that what defines a good day? Hope you give it a try. Click on Mary or Sarah's sites. Visit Pintangle and enjoy!

Friday, June 15, 2012

Daisies and Lavender Pincushions- The magic is in the details!

Black Eyed Susan Linen Pincushion


Lavender and Linen Pincushion


Sometimes it you need to add that one last detail to take something from average to extraordinary. Perhaps it is adding function and ease of use, sometimes it means you need to pop on one more detail in the design.

I've had a lot of requests for this pincushion. Its so nice and big and pretty. I began with the Lavender design and just finished the Black Eyed Susan version.
This particular design is simply the "classic". You can find that tutorial on my blog.

What makes this one better than the rest is the embroidery. Its simple yet really pretty.
I even hand embroider a covered button to completely customize this design.


A standard detail in most all of my pincushions is the pocket of emery enclosed in each cushion. It adds just enough emery to keep your pins sharp, without over-polishing them to the point that the finish is worn off.


The emery pocket is simply a small disc, made of muslin. Its filled loosely with emery and stuffed inside each classic pincushion. You can feel it if you give your pincushion a squeeze. The emery is surrounded by polyester fiber fill. This gives each pincushion a lofty, plump appearance. It also provides a safe way to store your pins and needles long term.

To find out how to go about creating the button for this pincushion, go to my list of tutorials on the left side of my blog.

Friday, June 8, 2012

Two Pear- The Joys of Collaboration

Two Pears for Two Pair
The Crazy Quilted Bosc Pear


Perfectly Pink Pear


I really love the collaborative process. I wish more people would contact me with their ideas. Often, the best projects involve working with other artists, but it doesn't always have to be the case. Anyone with a favorite color and an image in their heart is a great partner in creativity.

I've done so many apple pincushions in my shop and I really love thinking of new ways to adorn them. But, every once in a while, its good to shake things up. Thus, the pear pincushion. I have so many beautiful images of pear pincushions in my Pinterest Board called- Stick with Me- Pincushions as an Art Form. I love how the shape reminds me of one of my favorite aunts. Creating a pattern was very hit and miss. I still don't know if I really have the right slope.

One of my best clients is always filled with ideas. She has favorite fabrics, loves vintage mother of pearl buttons, civil war reproduction prints, and so many things I really have enjoyed discovering. She usually picks out something I've made in the past and see's it in a different fabric, with different adornments, etc. I've been fortunate in my life as a portrait artist to explore the same process through paint.

Crazy Quilt Pincushion with robin's eggs


So, whilst visiting my blog or shop, or Pinterest board, please feel free to let your mind wander. Either to find your point of view in something you see and try it out. I don't mind if you try to do what I do, only if you do it your way. Let me be a stepping stone to something amazing. If you are not the type to sew what I sew, ask me to give your idea a whirl. It would be my honor.


Wednesday, June 6, 2012

Strawberry Stumpwork Needlecase

Stumpwork Strawberries!


Stumpwork is a technique I have long admired and so ready to try. A few attempts fell flat, (no pun intended). The secret to stumpwork is to create dimension on a flat surface using traditional embroidery stitches. I always stumbled on the turned edge. Either the fabric frayed with all the stitchin and would not turn, or my stitches along the edge were never close enough to the edge.


Let me tell you my secret. I actually stopped trying to wing it and actually read how to do it right. I can be kind of like a man who doesn't pull out the directions until I can't figure out what to do with all the extra nuts and bolts. I like to dive right in and fly by the seat of my pants. Of course, a lot of trial and error doesn't hurt. Sometimes a technique takes more than a few tries before it works. I have a long way to go before I reach a level of those works I often admire. It just feels good to figure out something new and actually love the end result.


Here you can see how far the strawberries stand up off of the surface of the foundation. You can use wool or fabric or even felt. It does help when the edges of the fabric don't easily fray. I tried it with a loosely woven linen with disastrous results.

Add some pretty, standard embroidery stitches, some pretty vintage buttons and your project comes alive!

This is my new needle case design that I really love. A tri-fold design offers some nice sewing features.


The inside cover includes a stuffed wool pincushion lining. I added a little pocket and felt pages to hold even more needles and pins.

Here is another needle case in gray wool with sweet vintage buttons. You can find it in my Etsy Shop- Fiberluscious.


Here is another with a more modern flavor.


I hope you give stumpwork a try. A small project or sampler piece makes learning fun.

Friday, May 25, 2012

Strawberry Special in June!

Let's Celebrate Strawberries!


While plant shopping yesterday I noticed some yummy strawberry plants. Not only were they in bloom, they already had fruit. In Wisconsin, any early harvest is something to celebrate!
I love creating Strawberry Emery Pincushions.


I love changing it up and thinking of new approaches to traditional favorite sewing tools.


Here is my very elegant strawberry with crystals. Available in Red, Burgandy, Black, Brown and Turquoise


Here are some felted beauties! The design varies and I invite you to choose a color scheme you love and I will custom felt your strawberry.


I've designed some new designs for my Etsy Shop. Here's My first new design...The BIG Strawberry!
This one is 4 1/2 inches long, 2 i/2 inches across and 7 inches around at the top! I made it with a lovely recycled wool in a radiant red raspberry. I initially thought of a very delicate embroidery design in stranded floss but decided to go with #5 perle cotton and bold shapes. I created fun drooping flowers using long straight stitches, long bullion stitches and french knots. The base of each flower is bright green satin stitches. The stems are wrapped a back stitch with subtle color changes and french knots. The tiny leaves are easy fish bone stitches. I ran a running stitch around the cream colored white top. I added more straight stitches and french knots and a strong loop covered in cast on stitches. For the new or non-embroiderer, I just want to encourage you to give these simple stitches a try. I think anyone can master stitching. I think hand embroidery is like signing your name to your work. It goes so far beyond a machine stitch. Everyone has their own style and sense of design. Its such a unique way to create a personal statement.
Here is is with my emery strawberry and a cute little felt strawberry I made.

I'll be offering a tutorial on making your own strawberries. Best of all, any purchase over $50.00 in my Etsy Shop comes with a free Strawberry Emery Pincushion! Yup, free. My treat.

So get out the shortcake, buy some whipped topping and get ready to get your strawberry on in June!

Click here to check out my 3 for $20.oo Assorted Strawberries on Etsy. Normally, they are $8 each. Save $4.00!


As with all of my Etsy items, I'll throw in a gift box or tulle wrap free of charge. In a hurry?... I'll ship right to your special someone.